Transmission Removal and Replacement
- Oct 9, 2015
Transmission removal and replacement
Time: 4-5 hours
Tools: standard socket set, standard wrenches, floor jack and jackstands, torque converter holding tool (optional), transmission jack (optional)
Cost: varies depending on tools required or transmission selected
Tinware: transmission fluid, transmission tailshaft plug, new transmission mount (recommended)
Tip: After removing the driveshaft from the rear of the transmission housing, install a stop plug over the tailshaft to avoid fluid from spilling out.
Performance gains: Transmission trouble is never fun. Whether it’s for repair, rebuilding, or all-out racing, a finely-tuned transmission is a cornerstone of performance.

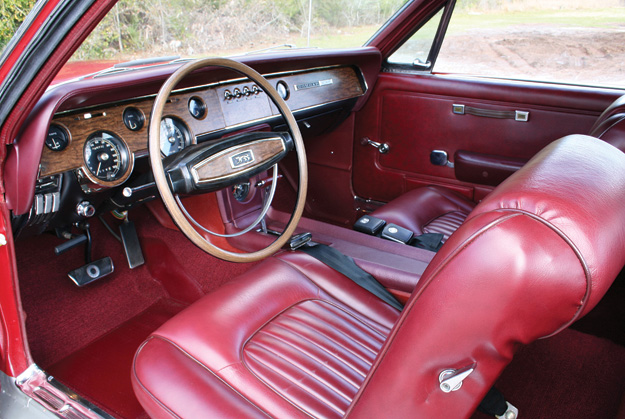
Release the transmission shifter linkage from the steering column.

Depending on application, most of the transmission-to-engine mounting bolts can be accessed from the top of the vehicle.

Loosen and remove the trans mount-to cross member support bolts (2 bolts).
Transmission removal and replacement in any vehicle is always a delicate procedure. It requires time, open space, and plenty of patience. Located smack-dab between the engine and the rear drivetrain, the transmission and its various counterparts literally serve as the middle man in the forever-valuable transfer of power. Whether you prefer manual domination or the creature comforts of an auto-pilot, the basic principals and operation of the transmission remain a constant. This goes for removing and installing as well. Although there are many modifications to be made on individual components, this project narrows the focus on just getting the beast safely in and out of the car. Make no mistake, this is an involved project. There are many steps, but none of them are overly-complicated.
Transmission Removal: Let's get started:
You can make the swap as one complete assembly (engine included), or opt for the transmission alone. This is really just a matter of preference or necessity. Regardless, start by disconnecting the negative battery cable from its terminal post. Why leave any room for sudden surprises, right? Drain any fluids (i.e. coolant, engine oil, power steering fluid, etc.) from the motor that may result in a spill during the process. At this point, it’s a good idea to start taking pictures. Not only will this help you during the re-installation process, it will look good in the scrapbook too! Disconnect any and all electrical connectors from the engine/transmission assembly. This may include the engine harness, the neutral-safety and back-up light switches (if applicable), and the throttle valve detent switch. Keep in mind the order and approach may vary slightly from one tranny to another, as GM produced and offered more than a handful of different designs over the years.
Continue the disassembly by removing the air cleaner and the throttle linkage cable or rods. You want to create as much room as possible for easier access to other areas. Unbolt the shifter linkage at the steering column and remove any retaining clips (see photo 1). Floor shift cars will require the removal of the shifter boot and housing, the center console (if so equipped), and the shifter mechanism. On a 4-speed, disconnect the Z-bar rods and springs. Be careful, these pieces may still be loaded under high spring pressures.
And underneath the car:
Now it’s time to turn your attention to the underside of the vehicle. Before going any further, safely raise and support the car using a floor jack and a sturdy pair of jackstands. You will need to loosen and remove the lower shifter and/or clutch linkage from the side of the transmission case. Anything that may obstruct a clean removal must go. Keep track of and label all of your hardware, clips, and retainers. Again, pictures will also help. This will make the reassembly a much smoother operation. The speedometer cable and the oil cooler lines (if applicable) should be next on the list. The speedometer cable will simply unthread from the case and slide right out. The cooler lines should be labeled for pressure or return prior to removal, and tied back out of the way. Be prepared for a little spillage when disconnecting the lines. On some models, it may be necessary to unbolt the exhaust pipe (s) from the collector for added clearance. Sometimes it’s easier just to remove the whole system from the collector rearward, including the mufflers. This is especially true when crossover bars or X-pipes are implemented mid-way in the exhaust system. At the rear of the car, unbolt the U-joints and disengage the driveshaft from the transmission tailshaft.
Pulling the transmission out and away from the back of the motor requires the torque converter to be loosened from the crankshaft flexplate. Start by removing the flywheel/torque converter cover at the front of the transmission. You should then have sufficient clearance to access the converter mounting bolts. Remove the converter from the plate and secure it to the body of the transmission. Be sure to mark the orientation of the torque converter in relation to the flexplate for reassembly.
Support the transmission housing with a floor jack and remove the trans mount to-crossmember support bolts. Loosen the bolts securing the crossmember to the frame and slide it towards the rear of the vehicle. With the engine properly supported as well, the transmission-to-engine/bellhousing mounting bolts may now be removed. Manual transmissions may be pulled with or without the bellhousing. The case is typically mounted to the housing by four bolts. With the transmission isolated, slowly slide the assembly rearward and lower to the ground.
To install, realign the proper matchmarks and lubricate all bearings and shafts with clean engine oil. Raise the transmission with the floor jack and secure to the engine block. Reattach all components, linkage, and hardware using the manufacturer’s proper torque values. Refill the transmission case with fresh fluid if necessary.
References on Transmission Removal
There’s a great 12 minute video on youtube.com that covers the removal of a Muncie transmission on a ’66 Pontiac GTO. Of course, this would also apply to any GM A-Body. In fact, the procedures utilized will cover many GM vehicles from 1964 through the late 1970s. Check it out here: https://www.youtube.com/watch?v=0mzg69kgKQI

Muncie 4-speed transmission

Having access to a lift makes the job that much easier.


