Corvette Caliper Covers A Great C4, C5, C6 Or C7 Brake Option
- Mar 4, 2015





ProductExpertsAvailable


Remember those awesome names Ford gave some of their paint colors back in ’69 and ’70? In addition to the “Grabber” colors, the marketing folks also decided to take advantage of the culture and trends of that era. We’re glad they did, because it gave us some standout print ads and commercials.
By 1972, Ford still offered a vast selection of colors, but the party names had all vanished. Grabber Blue was the sole survivor of the “Grabber era”, and was axed after the 1974 model year.
After purchasing a new carpet kit, remove the pieces from the box and lay them out flat. This will help take the folds and creases of packaging 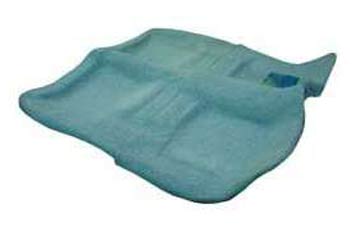 out of the rug before it goes into the car. If the weather permits, lay the carpet outside in the direct sun with the plastic backing facing up- allowing the sun’s heat to soften the mold and ease in the installation.
Today John shows off control arms for your 1955-1957 Classic Chevy. A great way to keep your steering in tact!
"We’ve found your car" are the four most desired words you can hope to hear when your car has been unlawfully taken from your possession. In the case of Terry Dietrich, those words were uttered to her earlier this month some 42 years after her first love – a 1972 Chevrolet Corvette Stingray – was stolen in Duluth, Ga., just six months after it was bought.
But, as is typical with stories of long lost automotive loves, those four words were often followed by an endless amount of bureaucratic red tape and an unmovable state agency.
If you are looking to add/upgrade disc brakes on your Chevelle, you’ll need to pay close attention to the wheel on the hub assembly. Often times, the mounting plane of the new hub will cause the wheel to sit further outward in the wheel well. Depending on the wheel and tire size, this slight variance can create all sorts of clearance problems. Check it out before installing or assembling the parts!
Be careful with those ever so delicate roof drip moldings! These thin, stainless moldings literally “pinch” over the drip channel in the roofline. The best way to remove them is to use a small block of wood and a rubber mallet. In some cases, you can actually remove them by hand. But like we said, they are extremely fragile and easy to kink, so be very careful. Start from whatever end of the molding is easiest. Wedge the end of the wood block underneath the lip and slightly tap it with the mallet. Try to avoid a “square” hit on the lip of the molding. This will only damage the piece and make it more difficult to remove. The key is to position the block just behind the lip between the roof channel and the molding. It should take minimal force to pop and release the trim from the roof.
Replacing your window regulators or door latch mechanism assembly?
Dust Buster (or a generic “canned air” product) is commonly used to clean computer keyboards. Basically, it is cold, compressed air in a can. It works great for blasting unwanted debris from your car’s nooks and crannies. We’ve used it to blast dust from interior vents and to remove dried, crusty wax residue on the exterior (especially around emblems). The air comes out of the can under high pressure and is extremely cold, so short bursts work best. If you’re concerned about the pressure damaging a part, use from a further distance and try light “bursts” first.
A hair dryer works best to loosen the adhesive used to keep sticker/decals in place. Go slow and be aware that too much heat could damage paint. Here, as we use it on glass, that is not a problem.
Heat an edge of the sticker/decal and try to peel it away. As it loosens, pull more of the sticker away from the surface until it’s free.